Optimizing Docker Cache
The PR where these changes are applied is: https://github.com/k-candidate/helvetic/pull/1.
Before: 3min

After: 44s

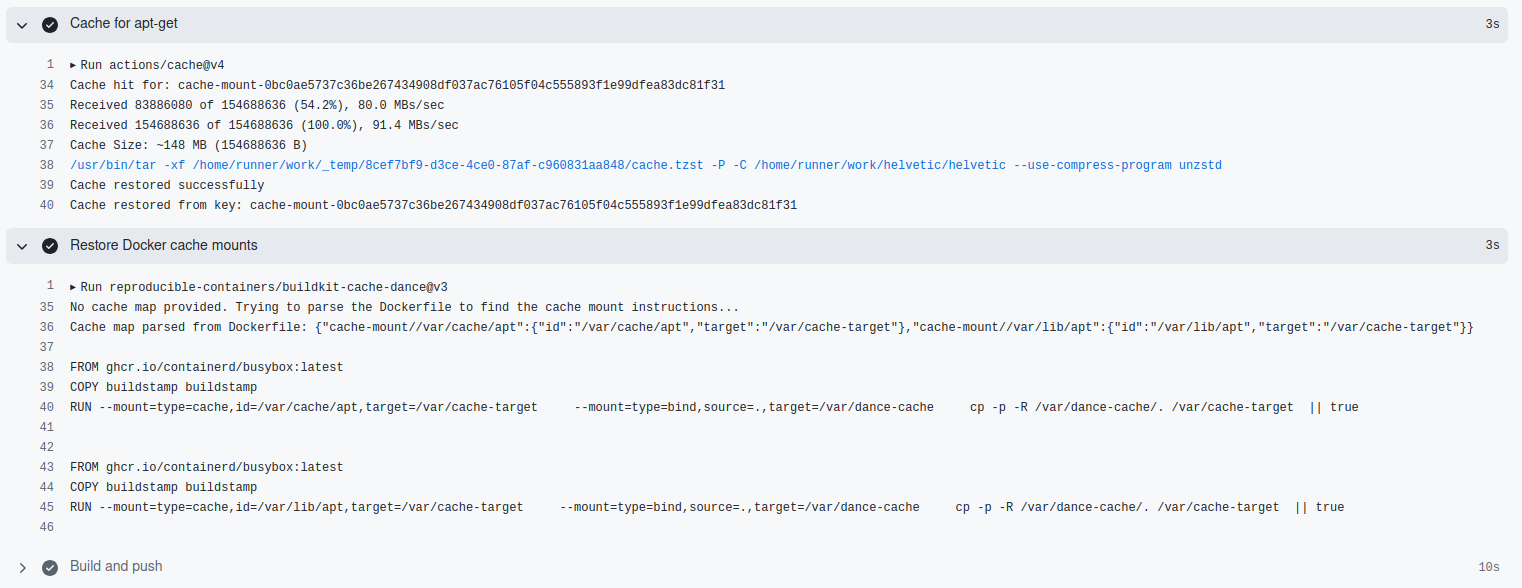
This is a 75% reduction in build time.
References
- https://docs.docker.com/build/cache/
- https://docs.docker.com/build/cache/backends/
- https://docs.docker.com/build/cache/backends/registry/
- https://docs.docker.com/build/cache/backends/gha/
- https://docs.docker.com/build/cache/optimize/
- https://docs.docker.com/build/ci/github-actions/cache/
- https://github.com/docker/build-push-action/
- https://github.com/actions/cache
- https://github.com/reproducible-containers/buildkit-cache-dance
- https://www.youtube.com/watch?v=npC0W2CW_as
- https://www.youtube.com/watch?v=y9XssbBRIi4
My Notes
- Knowing how to optimize the build cache is a great tool for making sure the builds run fast.
- If a layer changes, all other layers that come after it are also affected. If a layer gets invalidated, all layers that follow will need to run again, too.
- A layer is reused from the build cache if the instruction and the files it depends on hasn’t changed since it was previously built. Reusing layers from the cache speeds up the build process because Docker doesn’t have to rebuild the layer again.
- The techniques one can use to optimize build caching and speed up the build process:
- Order the layers: Try to make the expensive steps appear near the beginning of the Dockerfile. Steps that change often should appear near the end of the Dockerfile.
- Keep the context small: The
.dockerignorefile works similarly to.gitignorefiles, and lets one exclude files and directories from the build context. Ignore-rules specified in the.dockerignorefile apply to the entire build context, including subdirectories. Exclude temporary files, log files, and build artifacts. - Use bind mounts: The
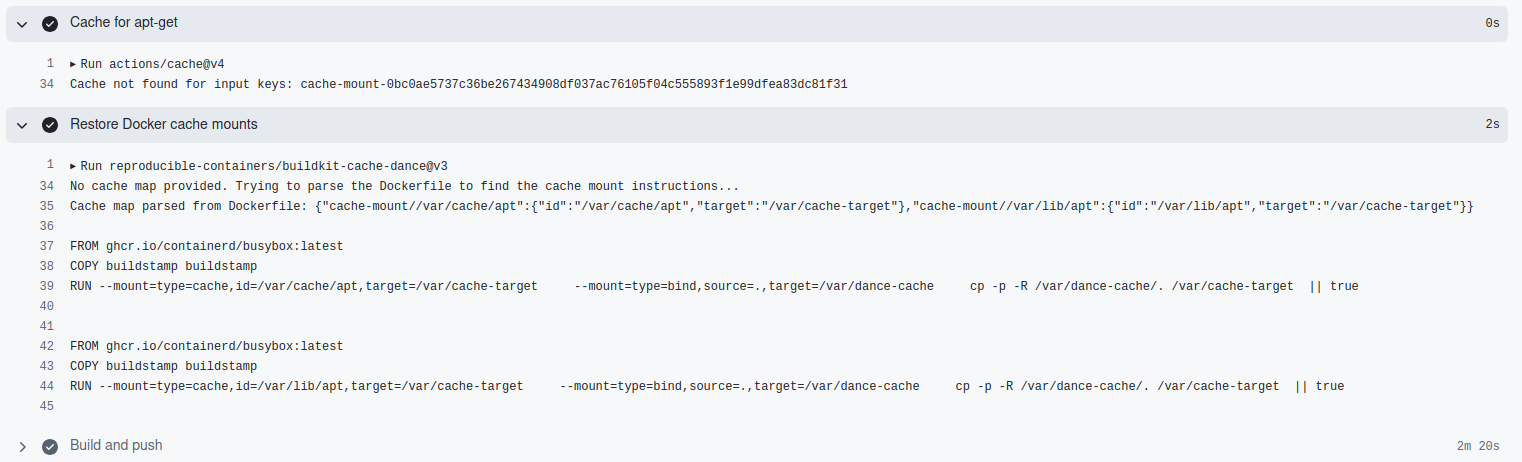
COPYandADDinstructions in a Dockerfile let you copy files from the build context into the build container. Using bind mounts is beneficial for build cache optimization because you’re not adding unnecessary layers to the cache. If you have build context that’s on the larger side, and it’s only used to generate an artifact, you’re better off using bind mounts to temporarily mount the source code required to generate the artifact into the build. If you useCOPYto add the files to the build container, BuildKit will include all of those files in the cache, even if the files aren’t used in the final image. - Use cache mounts: Cache mounts are a way to specify a persistent cache location to be used during builds. The cache is cumulative across builds, so you can read and write to the cache multiple times. This persistent caching means that even if you need to rebuild a layer, you only download new or changed packages. Any unchanged packages are reused from the cache mount. If using ephemeral CI agents, then this is not useful, except if you use something like https://github.com/reproducible-containers/buildkit-cache-dance.
- Use an external cache: The default cache storage for builds is internal to the builder (BuildKit instance) you’re using. Each builder uses its own cache storage. When you switch between different builders, the cache is not shared between them. Using an external cache lets you define a remote location for pushing and pulling cache data. External caches are especially useful for CI/CD pipelines, where the builders are often ephemeral, and build minutes are precious. Reusing the cache between builds can drastically speed up the build process and reduce cost. You can even make use of the same cache in your local development environment.